Data Migration from DVI version 5 (Available from version 6.1.2)
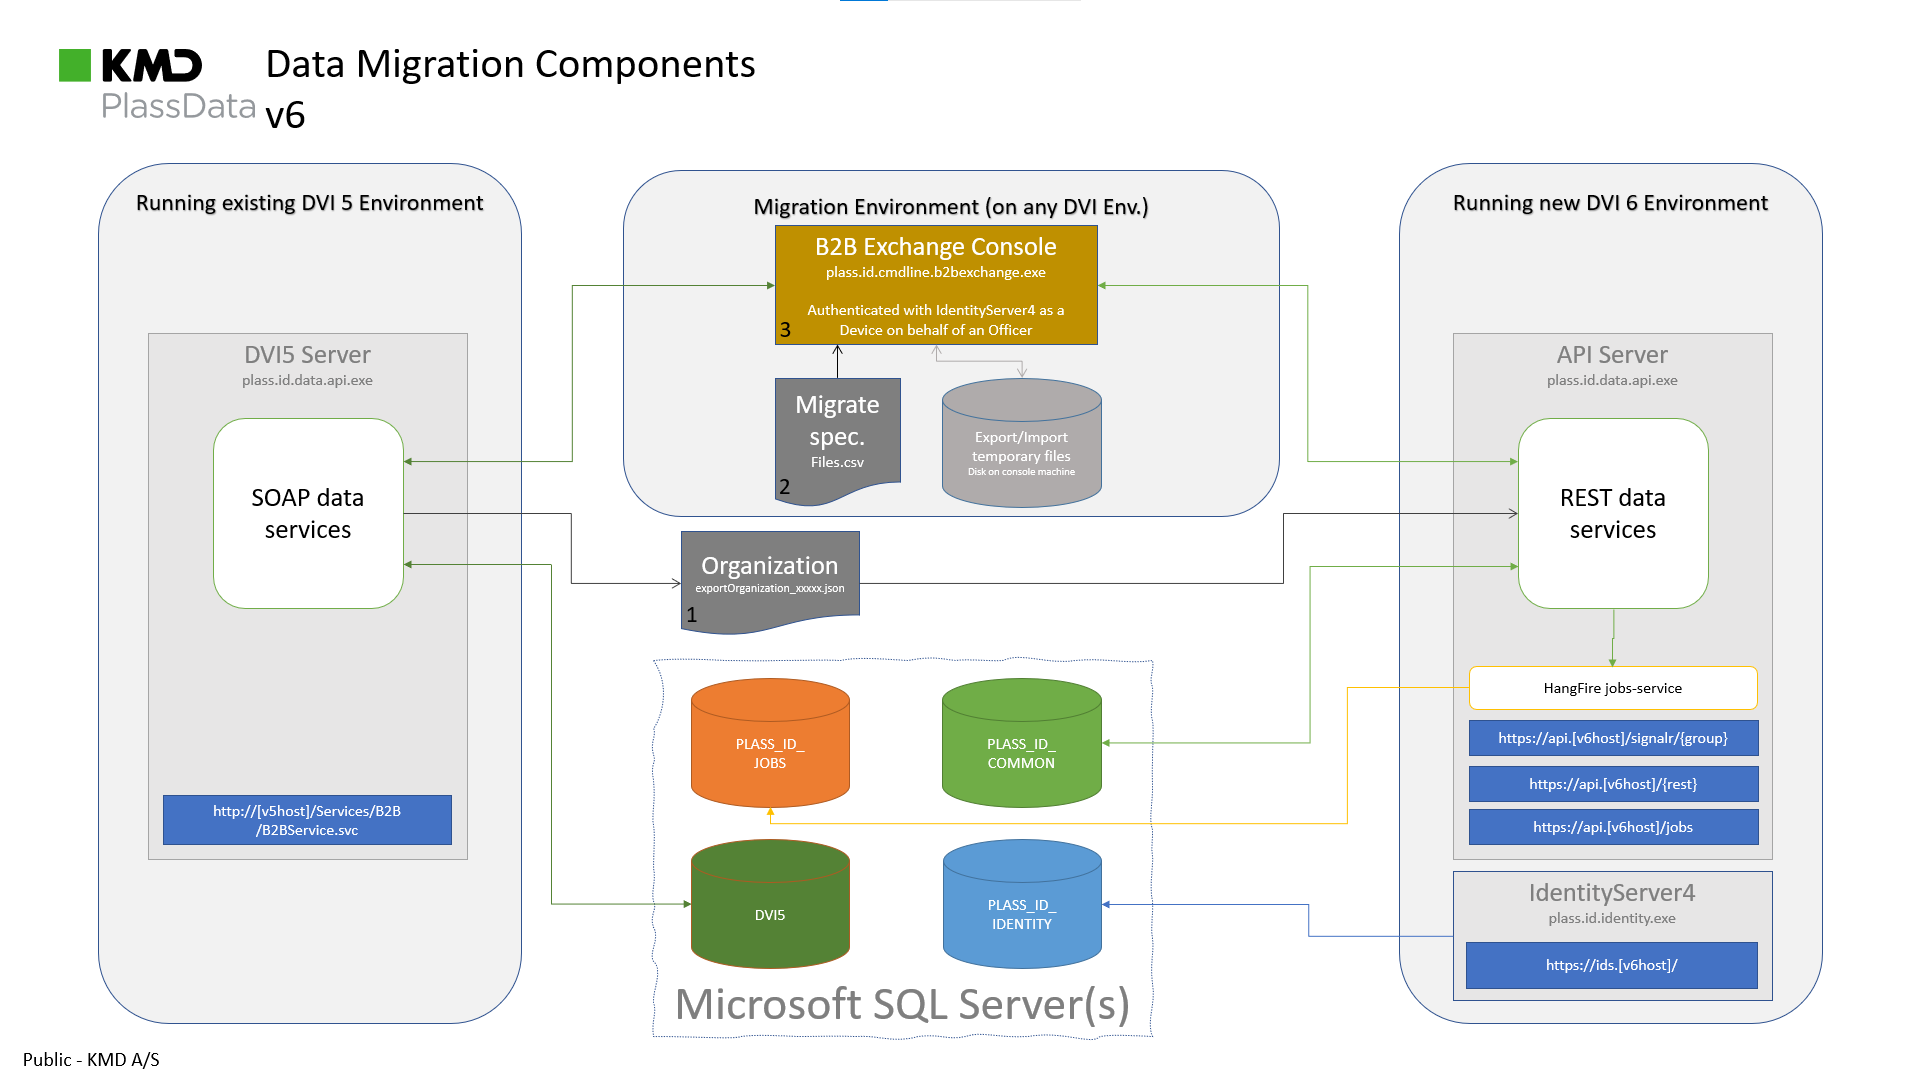
Data Migration components
The data migration consists of several components. See diagram above for a depiction of the components.
| Component | Description |
|---|---|
| Running existing DVI 5 environment (version 5.1.1.9 is required) | This is the installation you wish to copy data from. The environment has a SOAP data service interface, which will be used to extract data with |
| Running new DVI 6 Environment | This is the installation you wish to copy data to.The environment has a REST data service interface that will be used to insert new data. Note that DVI 5 environment and DVI 6 environment can exist side by side on the same server |
| Microsoft SQL Server(s) | The database server(s) where existing DVI 5 data (DVI5) resides, and the database server where DVI 6 data (PLASS_ID_COMMON, PLASS_ID_IDENTITY and PLASS_ID_JOBS) will reside. |
| Migrate specification (2) | The file that specifies which files to copy from the DVI 5 environment. See: SQL Query |
| Migration Environment (3) | The console program that will communicate with the SOAP interface on the DVI 5 installation and the REST interface on the DVI 6 installation to in order to copy data from DVI 5 to DVI 6. The program can be found in the DVI 6 installation package in the folder B2B |
| Migration Environment parameter file for communicatimg with DVI 5 | See description: Parameter file |
Steps
NOTE: This process is only available if you use Forms authentication in DVI 5.
Follow these steps to start data migration.
| Step | Description |
|---|---|
| Ensure that the organization (Agencies, Operations and Incidents) are in place on DVI 6 using DVI 5 organization Export and DVI 6 organization Import | If you authenticate using Form authentication in DVI 5, you’ll be able to export your existing organization from DVI 5, and import it to DVI 6. |
| OR Ensure that the organization (Agencies, Operations and Incidents) are in place on DVI 6 using a manual approach | Copy organization structure from DVI 5 |
| Get file list(s) from DVI 5 | SQL Query |
| Ensure connection to DVI 5 | Enter http://[V5HOST]/Services/B2B/B2BService.svc in a browser. The result should look like this: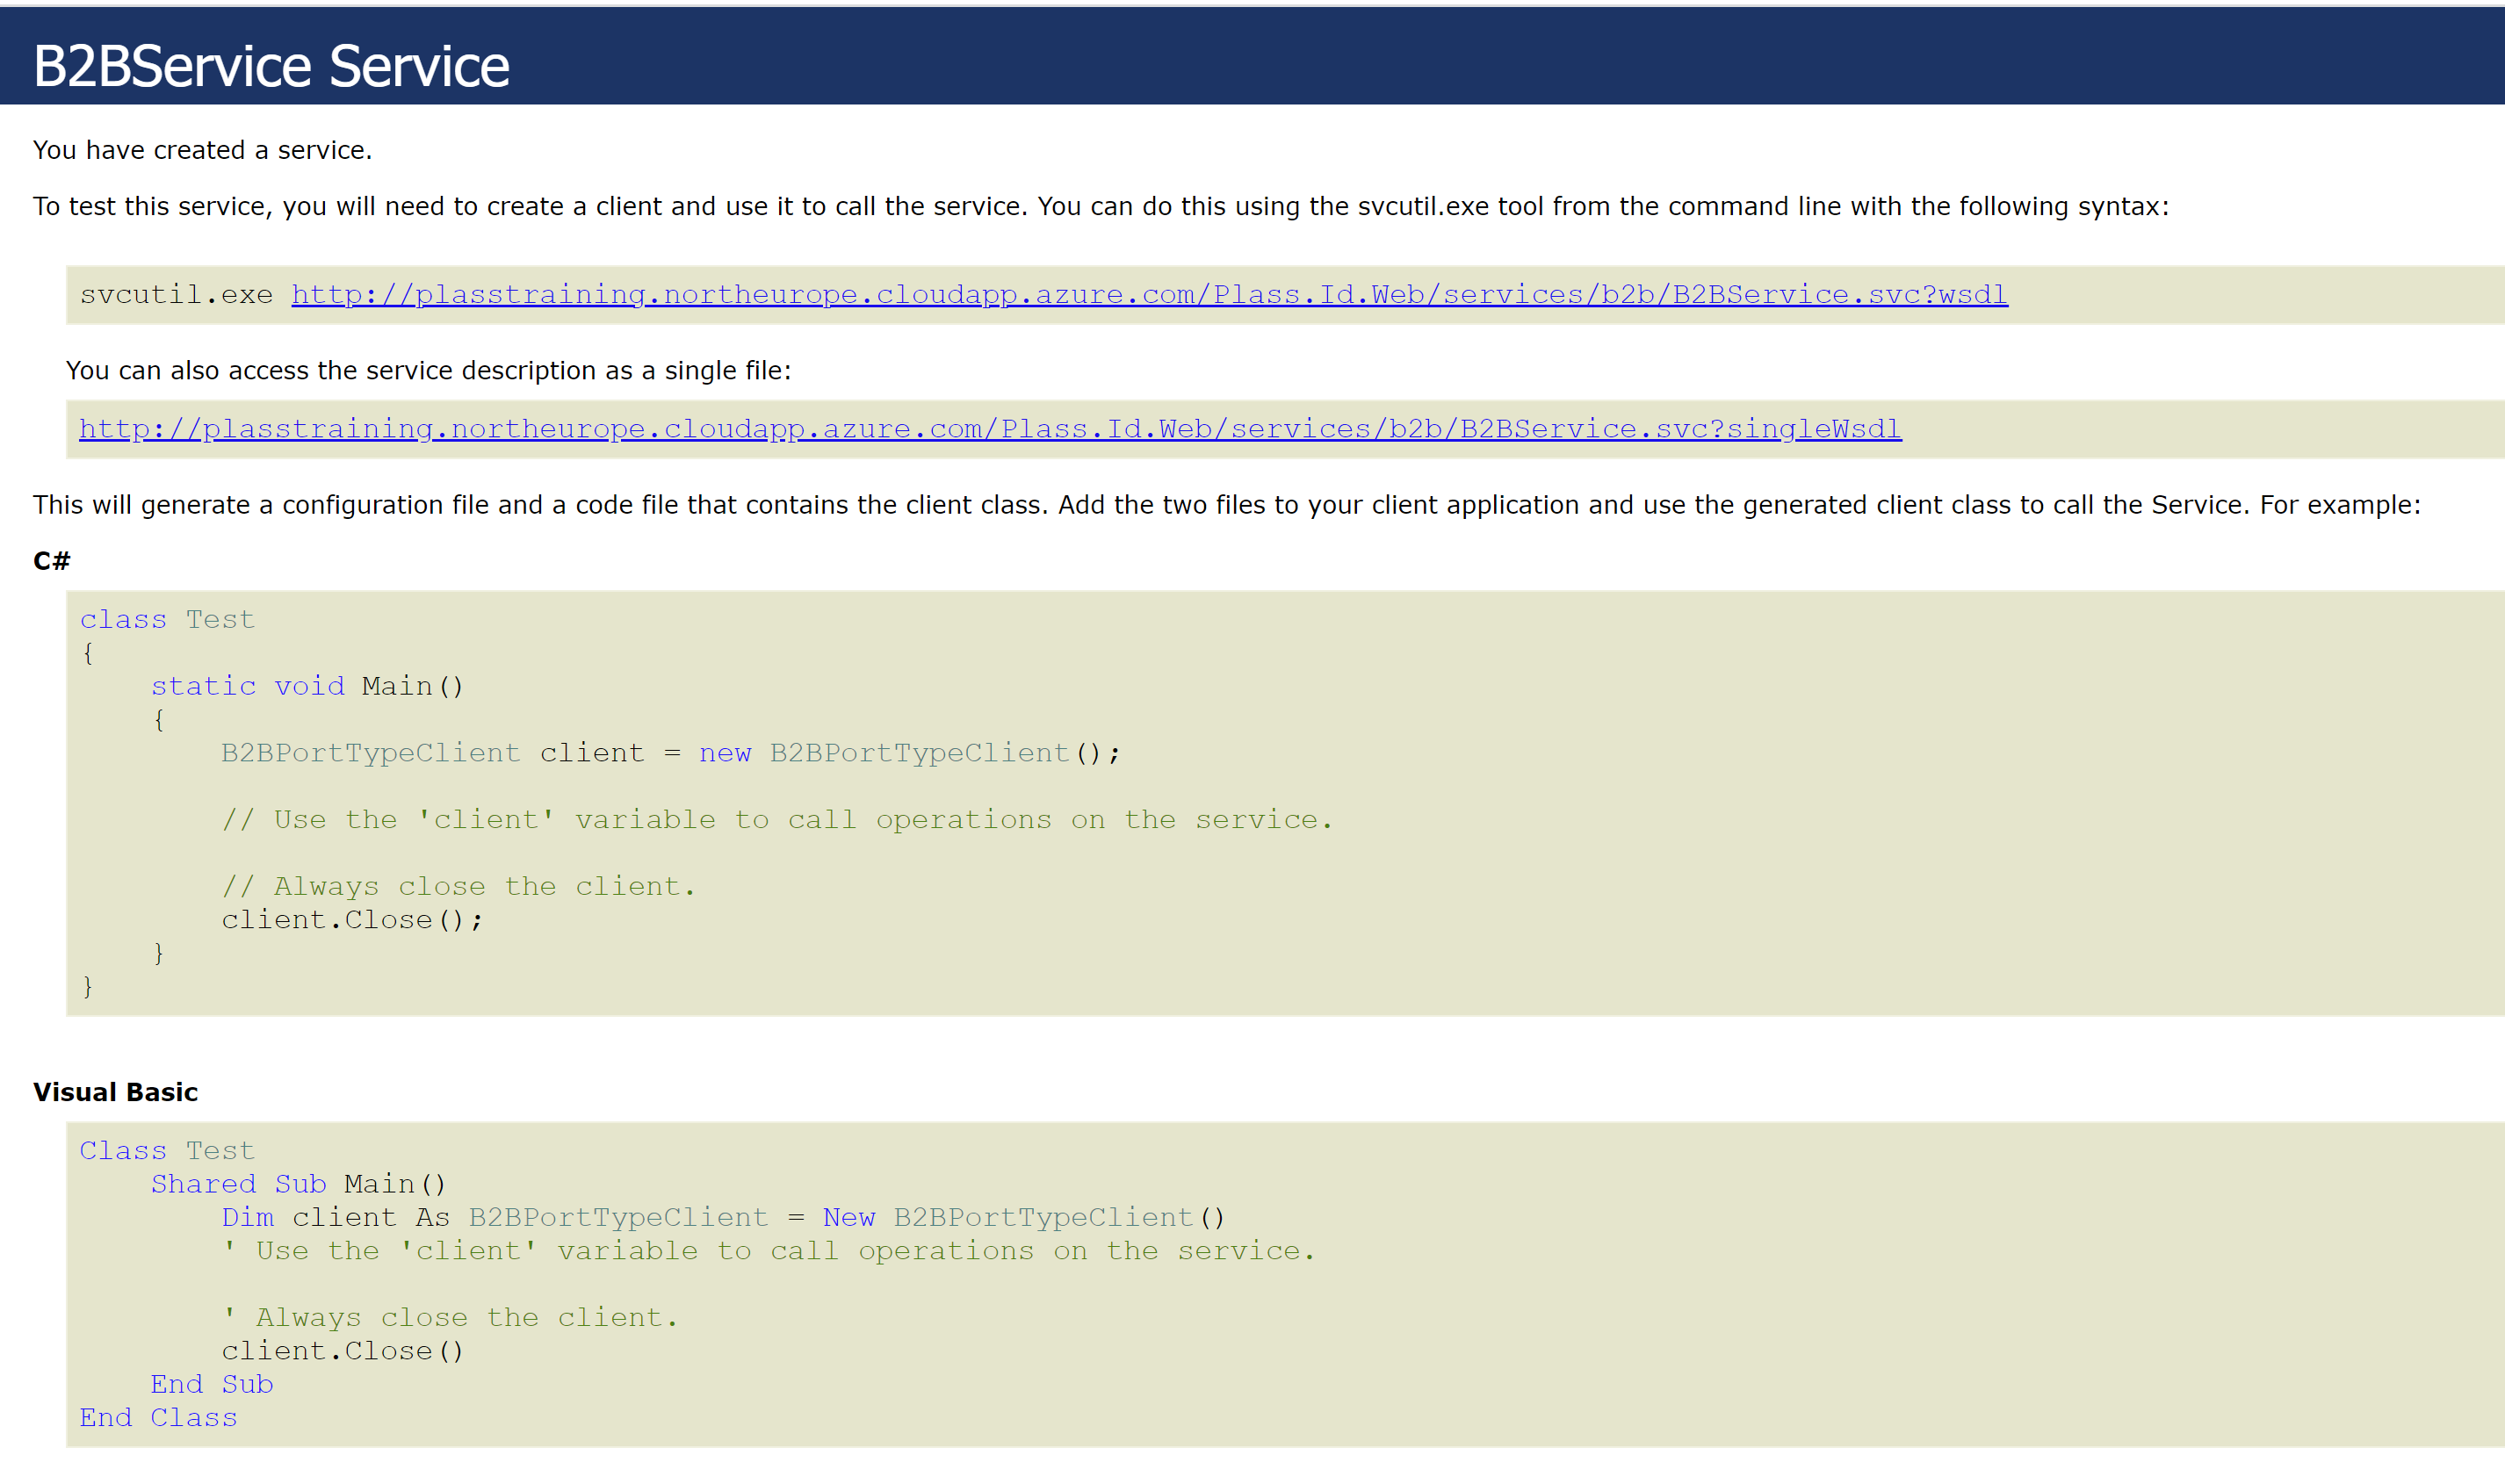 |
| Setup DVI 5 parameters | Test scenario |
| Setup appsettings for the Migration environment and for the DVI 6 environment. | Migration -> DVI 6 setup. |
| Test connection to DVI 6 | Run the bat file checkv6.bat in a console as Administrator from the folder B2B. Using the appsettings described in Migration -> DVI 6 setup. After Authentication , the result should look something like this: 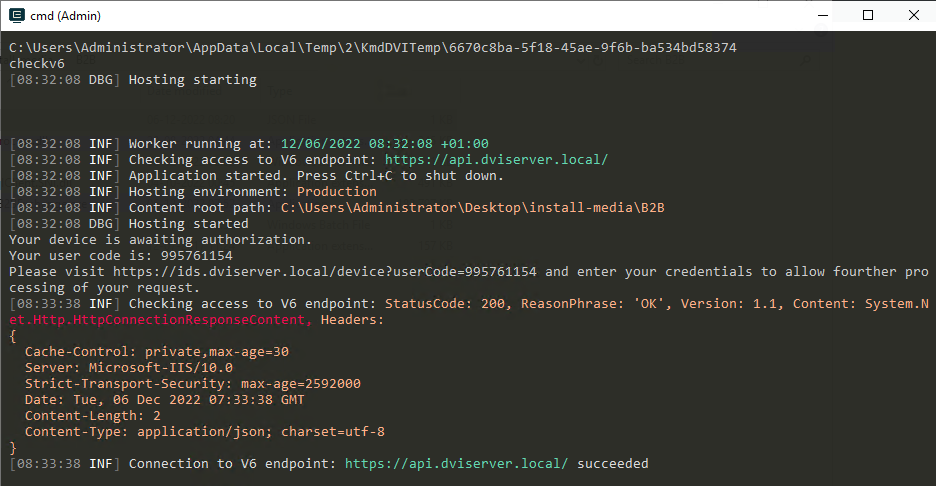 |
| Run the migration | Migration |
| Done | The following parts of this document are sub chapters that are referenced by the above steps, and should not be read sequentially. |
DVI 5 test scenario with agencies in two countries:
-
DVI 5 Site : http://plasstraining.northeurope.cloudapp.azure.com/Plass.Id.Web
- Agencies:

- Officers:

-
Containers
- Danish Agency:

- British Agency:
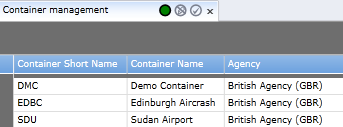
- Danish Agency:
Based on the test organization, the Parameter file file for the danish container should look like this:
{
  "V5User": "testDK@plass.com",
  "V5UserPassword": "P@ssw0rd",
  "V5Endpoint": "http://plasstraining.northeurope.cloudapp.azure.com/Plass.Id.Web",
  "V5ImportFilePath": "filesDK.csv"
}
For the british containers the Parameter file file should look like this:
{
  "V5User": "testGBR@plass.com",
  "V5UserPassword": "P@ssw0rd",
  "V5Endpoint": "http://plasstraining.northeurope.cloudapp.azure.com/Plass.Id.Web",
  "V5ImportFilePath": "filesGBR.csv"
}
Please note that an execution of the migration must be run for each country.
Export V5 organization:
- If you authenticate using Form authentication in version 5 you’ll be able to export your existing organization from version 5. See more here: Export organization
Import V5 organization to V6:
- See more here: Import organization
Obtain list of files with SQL Query and save it as a .csv file
We assume that the database storing the data is named DVI5.
If you only have files from agencies in one country, you need only one query.
In Microsoft SQL Server Management Studio enter the following query:
{
use DVI5

select F.FileNumber, ISNULL(C.ContainerShortName,'MPUB') as ContainerShortName
from files.[File] f
    left outer join [files].[ContainerFileLink] cfl on cfl.FileNo=f.FileNo
    left outer join [files].[Container] c on c.ContainerNo=cfl.ContainerNo
    inner join [setting].[CountryAgency] a on f.OwnerAgencyNo=a.AgencyNo
}
The columns in the result should contain FileNumber and ContainerShortName:
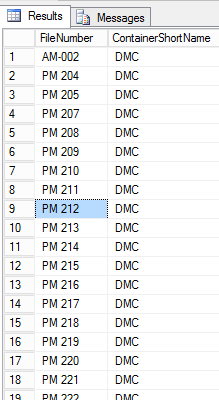
To save the result, right-click on the result and select Save Result As…
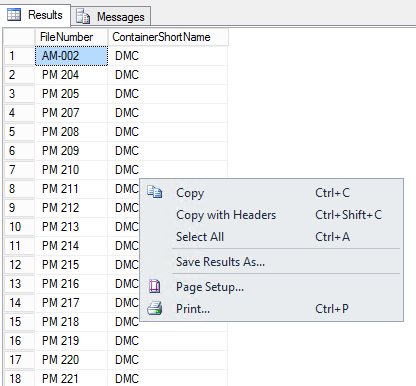
Save the file as files.csv in the B2B folder
If you have files from agencies in more than one country like in the Test scenario you have to make a file-list for each country.
- First make a list for the British files:
{
use DVI5

select F.FileNumber, ISNULL(C.ContainerShortName,'MPUB') as ContainerShortName
from files.[File] f
    left outer join [files].[ContainerFileLink] cfl on cfl.FileNo=f.FileNo
    left outer join [files].[Container] c on c.ContainerNo=cfl.ContainerNo
    inner join [setting].[CountryAgency] a on f.OwnerAgencyNo=a.AgencyNo
    inner join [cat].[CountryIPSG] ipsg on a.CountryCodeIPSG=ipsg.CountryCodeIPSG
where ipsg.CountryCodeISO3='GBR'
}
Save the file, as described above, as filesGBR.csv
- Next make a list for the Danish files:
{
use DVI5

select F.FileNumber, ISNULL(C.ContainerShortName,'MPUB') as ContainerShortName
from files.[File] f
    left outer join [files].[ContainerFileLink] cfl on cfl.FileNo=f.FileNo
    left outer join [files].[Container] c on c.ContainerNo=cfl.ContainerNo
    inner join [setting].[CountryAgency] a on f.OwnerAgencyNo=a.AgencyNo
    inner join [cat].[CountryIPSG] ipsg on a.CountryCodeIPSG=ipsg.CountryCodeIPSG
where ipsg.CountryCodeISO3='DNK'
}
Save the file, as described above, as filesDNK.csv
Manually copy organization structure from DVI 5 to DVI 6
To illustrate, we use this Test scenario
To copy the necessary structure, logged in as SysAdmin@plass.dk , you need to create the two agencies GBR and DK like described here. Then create the users testDK@plass.com in the DK agency and testGBR@plass.com in the GBR agency.
Finish by creating the Operations that corresponds to the Containers described in the Test scenario. Create the Danish operations logged in as user testDK@plass.com, and the British operations logged in as user testGBR@plass.com.
Configure V6 for communication with the migration process
-
To allow the migration process to be authenticated by V6, you have to add at least one Secret to the appsettings.json file in the Identity folder of the installation:
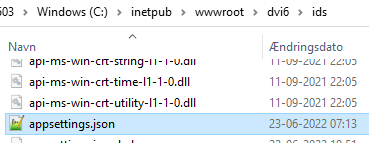
-
Insert a paragraph in the appsettings.json resembling the text below, where you replace MyFirstSecret with a text of your choice.
{
    "server:apiClientSecretInfos": [
    {
      "secret": "MyFirstSecret",
      "usage": "MyFirstSecret use"
    },
    {
      "secret": "MySecondSecret",
      "usage": "MySecondSecret use"
    }
  ],

}
- The resulting appsettings.json could then look like this:
{
   {
  "CORS": {
    "AllowedHosts": "https://dviserver.local;https://api.dviserver.local;https://ids.dviserver.local"
  },
    "server:apiClientSecretInfos": [
    {
      "secret": "MyFirstSecret",
      "usage": "MyFirstSecret use"
    },
    {
      "secret": "MySecondSecret",
      "usage": "MySecondSecret use"
    }
  ],
  "sql:ids2sql:catalog": "PROD_PLASS_ID_IDENTITY",
  "server:apiLocalEndpoint": "https://api.dviserver.local",
  "server:apiPublicEndpoint": "https://api.dviserver.local",
  "server:idsLocalEndpoint": "https://ids.dviserver.local",
  "server:idsPublicEndpoint": "https://ids.dviserver.local",
  "server:webLocalEndpoint": "https://dviserver.local",
  "server:webPublicEndpoint": "https://dviserver.local",
  "sql:ids2sql:dataSource": ".\\SQLEXPRESS",
  "token:Audience": "ids_api_res",
  "token:LifetimeMinutes": "5",
  "token:NameClaimType": "http://schemas.xmlsoap.org/ws/2005/05/identity/claims/emailaddress"
}
- In the Migration environment, the appsetting.json (find the file in the folder B2B) file has to reflect the endpoints and Secret that is defined in the appsetting.json above. The appsetting.json file in the in the Migration environment will then look like this:
{
  "apiServer": {
    "apiKeys": {
      "userSecret": "MyFirstSecret"
    },
    "baseUrl": "https://api.dviserver.local"
  },
  "idsServer": {
    "baseUrl": "https://ids.dviserver.local"
  }
}
Configure parameters for transfer of files from V5 to V6
To let the migration process know how to transfer files from V5 to V6, you have to edit the parameters.json file found in the B2B folder of the installation package 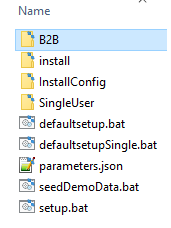
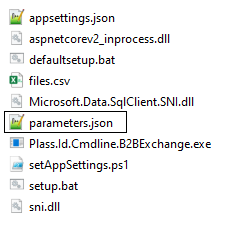
- The parameters.json should contain the following parameters:
| Parameter | Description | Example |
|---|---|---|
| V5User | Useraccountname of the existing DVI 5 user retreiving files from V5 | “user@plass.dk” |
| V5UserPassword | Password of the existing DVI 5 user retreiving files from V5 | “P@ssw0rd” |
| V5Endpoint | Url to the DVI 5 serversite | “http://someV5server.com/plass.id.web” |
| V5ImportFilePath | The files.csv created earlier | “files.csv” |
The resulting parameters.json could look like this:
{
"V5User": "user@plass.dk",
"V5UserPassword": "P@ssw0rd",
"V5Endpoint": "http://someV5server.com/plass.id.web",
"V5ImportFilePath": "files.csv"
}
Run the migration
Once the files.csv and the parameters.json file are in place, its time to run the migration.
- In a command prompt (Run as Administrator), navigate to the B2B folder mentioned earlier, type defaultsetup.bat.

- Hit Enter.
-
The program will now ask you to Authenticate yourself.
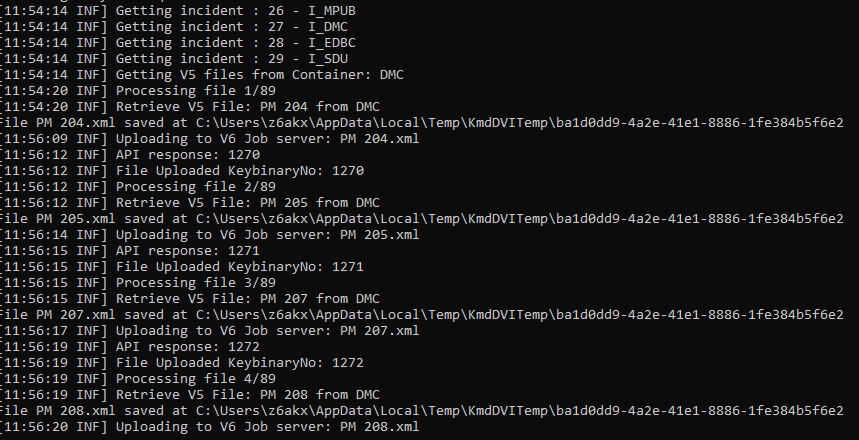
- For each V5 container, the process first transfers all files in chunks to the V6 server, and once that’s done, the import gets enqueued at the Job Server.

Authentication
-
When running the Connection test to V6 or the Migration, you will be asked to authenticate yourself: In this case we are connecting to the id server on https://ids-dvi6prod.plassdata.net

Copy the url (In this case https://ids-dvi6prod.plassdata.net/device?userCode=323068940) from the command prompt and paste it into a browser.
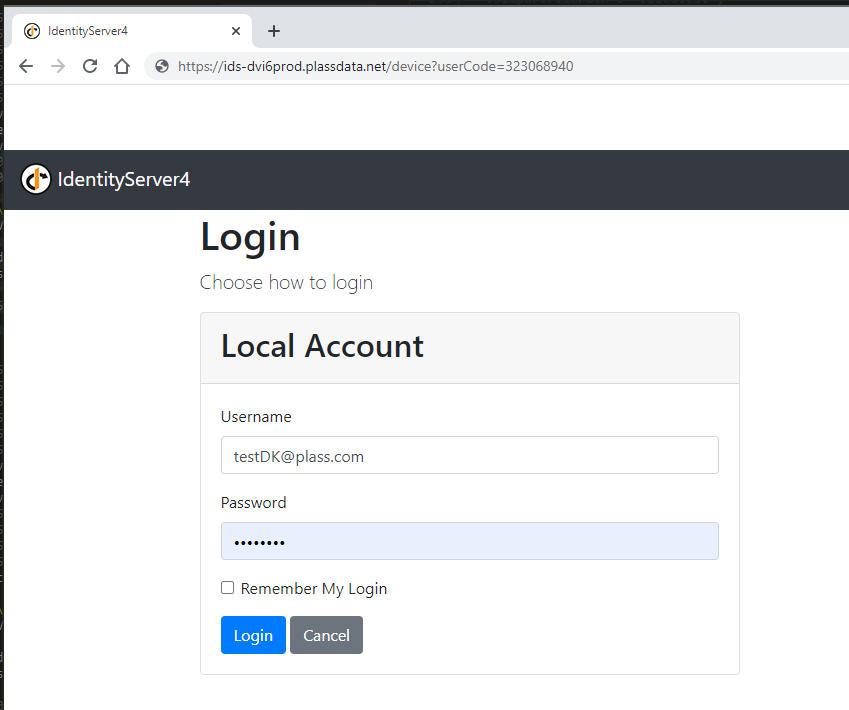
Login with an ADMIN user from a top level agency from the country from which you wish to import files.
Note that the sysadmin@plass.dk can NOT be used in this process.
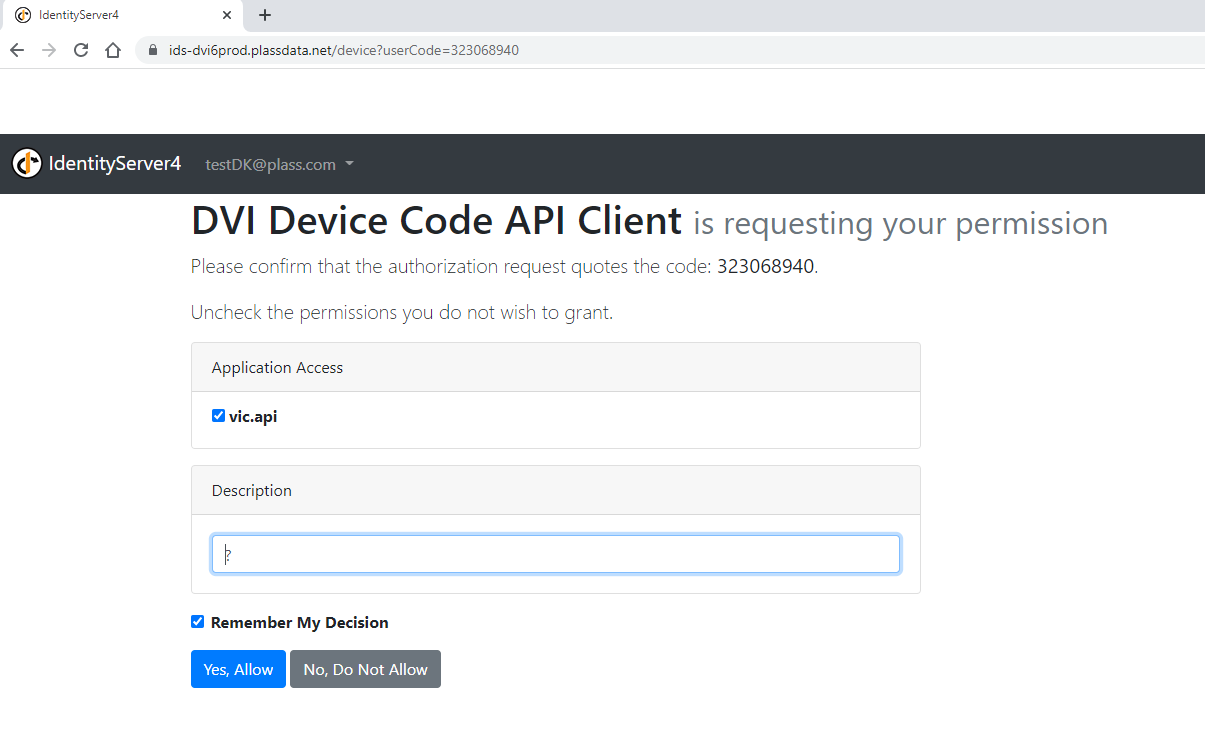
Click “Yes, allow”, to complete the authentication .
B2B folder
DVI 6 installation package
 => => 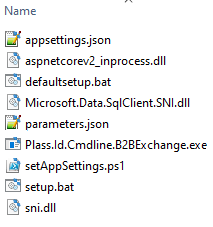 |
Post migration script
Some repairs needs to be done after the V5 => V6 migration.
- Address in field 500.
- Date in field 810.
- Reference numbers.
- Representation of User and date on C-Columns in field 700.
- Creation date on File.
- Creation date on some Attachments.
- “Use Field 105” checkbox in field 110.
- Field 105 when only “Date” or “Relationship” are filled.
There’s two scenarios in which you can run the script and one script for each scenario.
- Where the V5 and V6 databases are present on the same SQL server instance: Use the script Post_Migration_One_SQL_Server_Instance for this scenario. Replace the text “‘V6_DATABASE” with the name of the V6 database. Replace the text “V5_DATABASE” with the name of the V5 database. Run the script.
- Where the V5 and V6 database are present on two different SQL server instances: Use the script Post_Migration_Two_SQL_Server_Instances and run it on the V6 database SQL Server instance. Replace the text “V5_SERVER” with the name of the V5 SQL Server. Replace the text “V6_DATABASE” with the name of the V6 database. Replace the text “V5_DATABASE” with the name of the V5 database. Run the script.