Match Initiation and Results
Matching is a batch process which is started on the SQL server.
Initiate matching
To initiate matching immediately
- Select the Victim tab in the menu on the left hand side of the screen.
- Select the Match tab
- Select the Execute tab
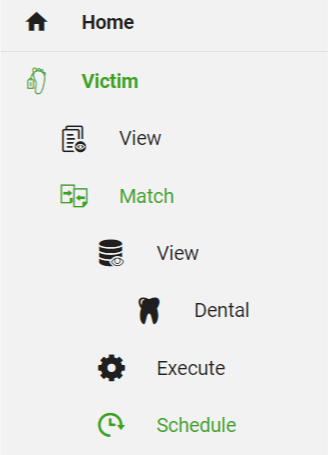
Now choose which kind of matching you want to initiate (Dental, DNA or Secondaries) and click it to initiate your preferred match (click Dental if you want to initiate a Dental match etc.)

Dental matching
The Dentalt matching process compares all dental data in AM and PM or PUI files.
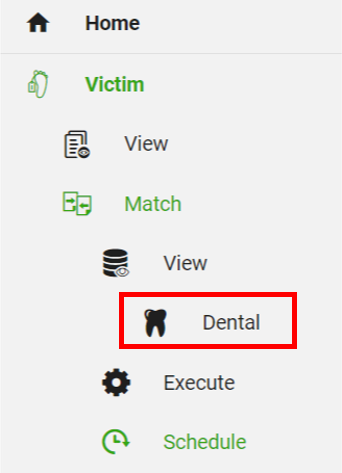
After initiating Dental matching select the Dental tab  in the menu on the left hand side of the screen to view the matching results
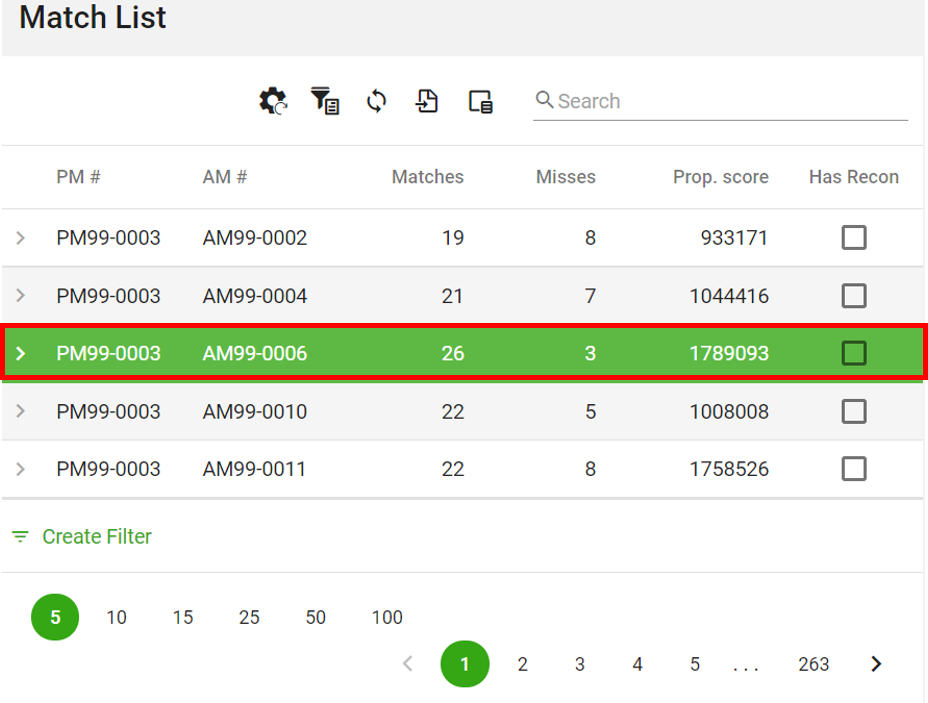
Now click the the file pair you want to explore to see the different result modes:
The match results will be presented in 3 different modes to allow various visual comparisons to be made:
- Match List
- Dental codes Comparison
- Odontogram Comparison
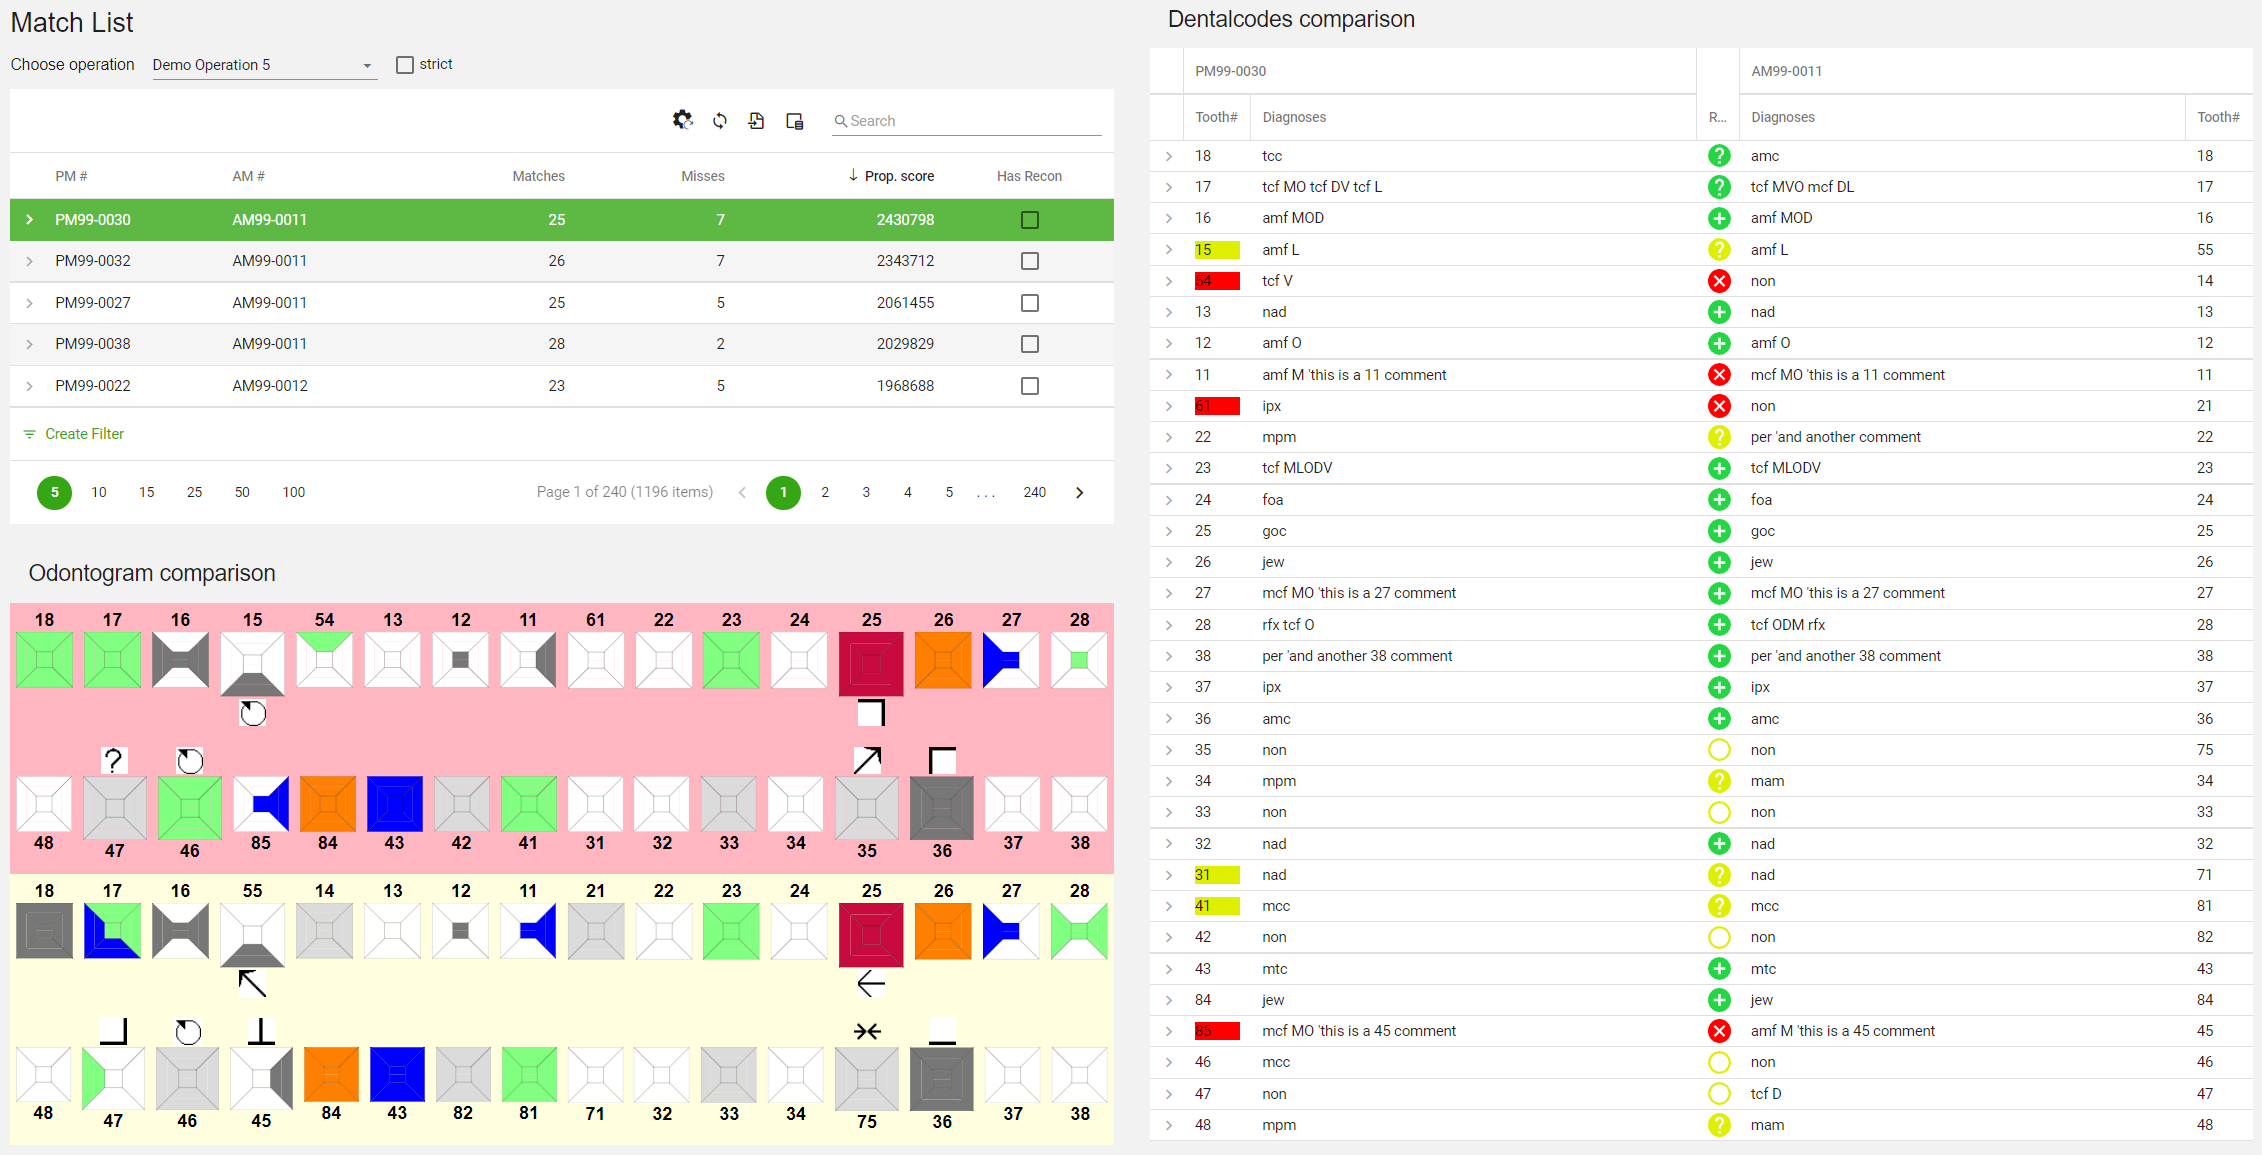
This setup makes it easy to scroll through the Match results while looking at the corresponding Odontogram Comparison and Dental codes Comparison.
Match list
The match results are initially presented in the Match list. The files which have the highest number in the Prop. score (probability score) column provide the best chance of identification.
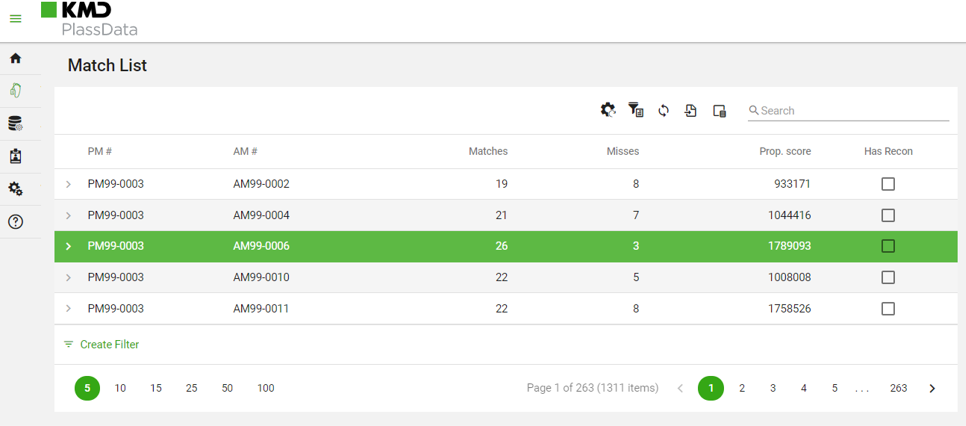
NOTE: You can sort the results by clicking the column name - you can sort by PM#, AM#, Matches, Misses or Prop. score.
To change the number of results shown on page 1 in the Match list click the arrow in the lower left corner of the Match List
 ‘
‘
and choose between 5, 10, 15, 25, 50 or 100 results per page.
To scroll between result pages click the arrows in the lower right corner of the Match list.

In the topmenu of the Match List  you can
- Reset layout

- Show filterbuilder

- Refresh the list

- Export all data or selected rows

- Choose which columns to show

- Search for specific case number

To view the corresponding Dental codes Comparison and Odontogram Comparison

and Dental codes Comparison and Odontogram Comparison results will appear on the page. To view a new file set just click on a new row.
Dental codes comparison
Visually compare the two sets of dental codes for the active file set in the Dental codes comparison:
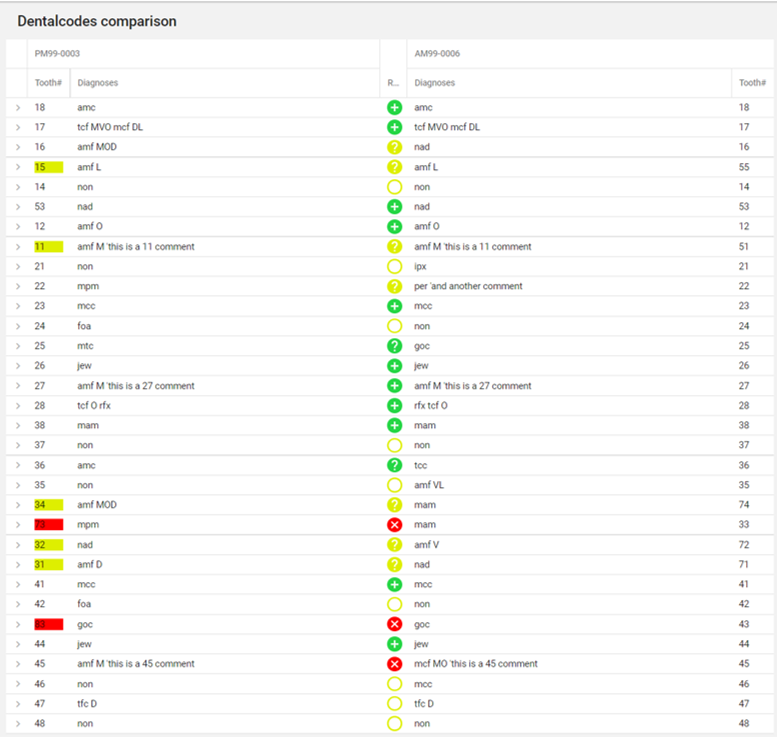
NOTE: You can sort the results by clicking the column name - you can sort by Tooth#, Diagnoses or Result:

NOTE: the colors are indicators of the match level (red, yellow and green):
![]() : codes and the surfaces are matching
: codes and the surfaces are matching
![]() : it’s a possible match (a code like “non” will always produce a “possible match”)
: it’s a possible match (a code like “non” will always produce a “possible match”)
![]() : no match (if more than one code has been entered in the odontogram on a particular tooth, and if just one of them is does not match (or one of the surfaces doesn’t match), then the match status will be “not matching”).
: no match (if more than one code has been entered in the odontogram on a particular tooth, and if just one of them is does not match (or one of the surfaces doesn’t match), then the match status will be “not matching”).
Too view details click the arrow ![]() to the far left of the tooth number
to the far left of the tooth number

and details on surfaces, fillings etc. will show.
Odontogram comparison
Visually compare the two odontograms for the active file set in the Odontogram comparison:
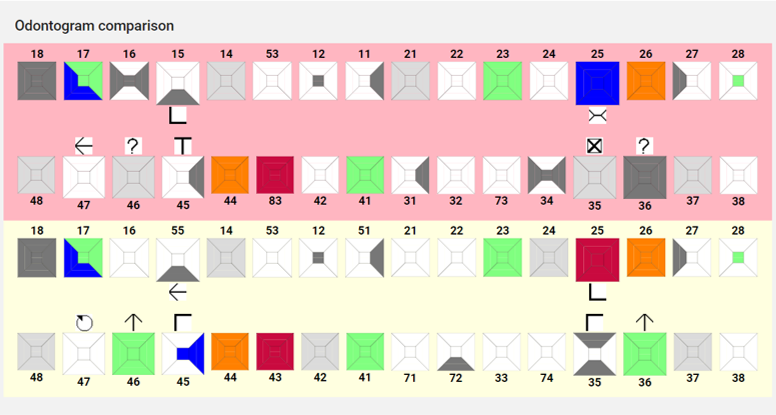
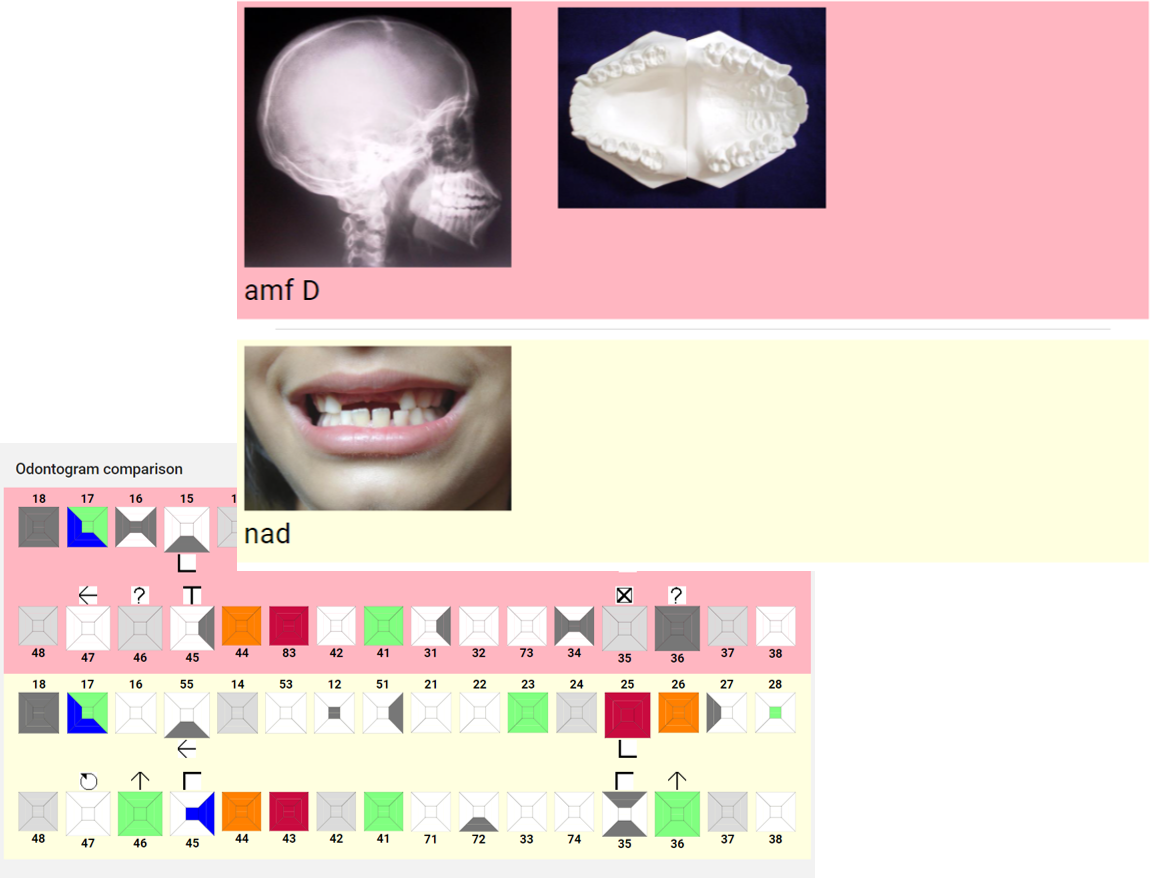
Hover over each tooth to view any attached images:
Create Comparison Report from Match List
If you want to create a Comparison Report for a specific file set right click the row with the relevant file set in the Match List Match List and click “Create comparison report between “file 1” and “file 2””
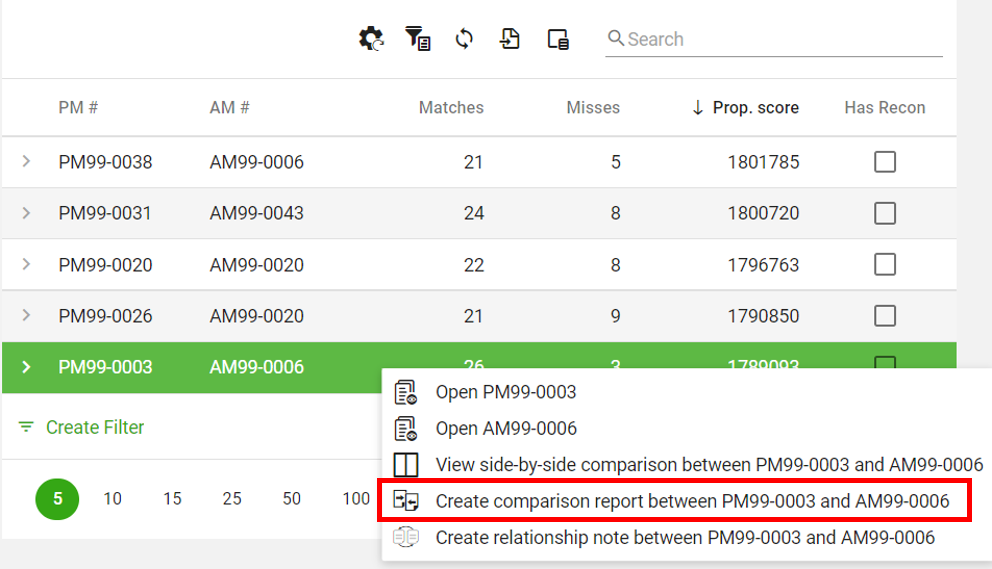
and the create comparison dialog appears:
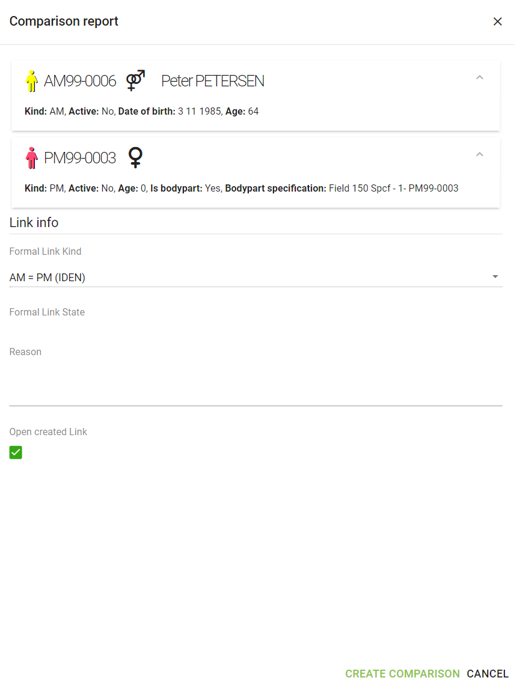
- Enter the motivation for creating the Comparison Report in the Reason field.
- To save the link, uncheck the box Open created link and click the button

- To proceed with filling data in the Comparison Report, check the box Open created link and click the button
 .
.